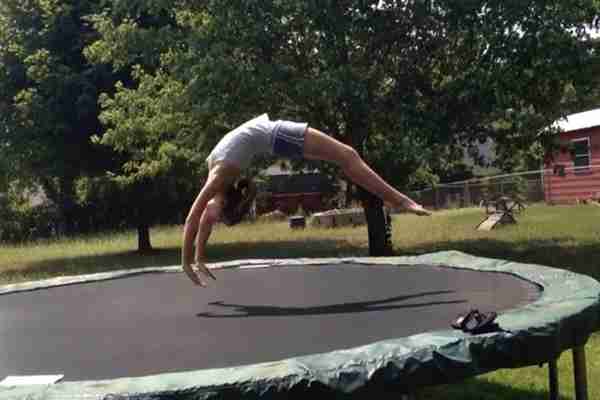
How to do a Back Handspring on a Trampoline the Easy Way
Trampolines and Back Handsprings

We are well aware of how addictive and fun trampolines can be, both for children and adults. There’s just no end to it – jumps, bounces, flips, drops and many other physical moves just feel more awesome when the jumper bounces right back up from them. In this text, we will discuss how to do a move that’s popular with recreational “bouncers,” but which not a lot of people can imitate easily. That move is the back handspring.
What Are Handsprings?
A handspring is when a person jumps in such a way that their body makes a full circle. There are two major ways to do a handspring. The first is the usual, so-called “forward” handspring, and it’s done by the person laying their hands on the ground in front of them, lifting their legs up high and finally “springing” with their hands back on their feet. The trick is to push the legs forward, not backward.
Speaking of “backward,” a back handspring is the opposite of a forward one. The person has to put their hands onto the ground behind them, making a “bridge” with their belly up. The legs soon follow, and one motion backward later the person is (hopefully) on their feet again. We say “hopefully” because there are folks out there who struggle to learn this move. That’s what this text is here for.
A Few Easy Tips for Back Handsprings

1. A Back Handspring without a Spotter
If we want to learn how to do a back handspring, we’d probably want to do it without someone helping us. After all, nobody is going to constantly stand with us on the trampoline while we try to jump backward.
In terms of the back handspring with zero spotters, there are four major moves we need to know:
- a. The arm swing
- b. The arch
- c. The spring
- d. The rebound
First, the swing. It looks and sounds easy enough, but most people fail to do it, and it gets them hurt later on. Namely, we have to “prepare” our jump by swinging our arms close to our body. What we want is our hands to be facing our back, parallel to our heels. Or rather, as close as possible.
Next, there’s the arch. And before we move on, we ought to discuss this part a little.
The “Grounded” Arch
This particular arch has our whole body on the ground. We’re essentially on all fours, but inverted. That would be the “bridge” mentioned earlier. Beginners ought to try practicing with this arch first.
The “Airborne” Arch
Once we’ve practiced the first variety of the arch, we will be able to literally bounce off of our hands without the need to land them on the trampoline. It’s a split-second motion and it makes the handspring look far more attractive. To put it simply, it’s an actual handspring, i.e. we spring from the trampoline upwards.
Speaking of…
The Spring and Rebound
These are the last two steps of the handspring. The first of these is self-explanatory – we spring up with our body using our hands. However, the rebound is important, especially on a trampoline. Once the feet hit the ground, we’re going to want to bounce a bit. This helps us stabilize on an otherwise unstable surface like the trampoline. If we fail to bounce back, the trampoline itself will bounce us and we can end face-first in the fence or in one of the metal parts that make up the body of the trampoline.
2. A Back Handspring with a Spotter

Beginners will love this step even more, considering it’s a bit safer than doing it without a spotter. First, we get a friend to spot us, naturally. Preferably one that has done it before. Next, we get them to place one hand on our lower back, and the other on the back of our knee. Our part of the job is to extend our hands forward, kneel a bit, and then do the four steps outlined above.
Spotting is difficult on a trampoline. Unlike gymnastics mats, they aren’t as firm or stable. It’s their bounciness that can prove to be rather problematic. So it’s always important to remember to practice this spring with the face close to the edge. That way our backs land on the soft surface with no injuries. This, of course, goes for non-spotter back handsprings as well.
A Few Last-Minute Pieces of Advice
Doing a back handspring on a trampoline demands good physical condition. Therefore, the best thing to do before “springing” is to stretch each limb well. This includes the wrists on both our hands and feet. In addition, the legs have to be close to each other when bouncing back. Otherwise, we risk landing on our faces or pulling a muscle.

